|
|

|
Getting started using the RISE modeling suite
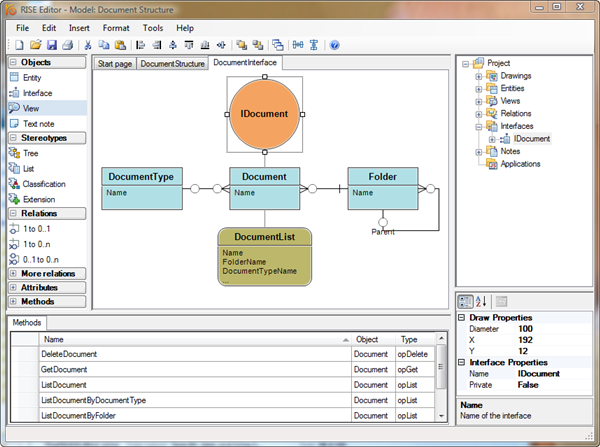
The RISE Editor is a graphical tool for creating and maintaining information system models and their application layer functionality. RISE supports Entity Relationship Diagrams using the Information Engineering notation (crow’s foot). This notation is suitable for printout of real world models, i.e. large models, because of its space conservative handling of relationships. You can use RISE to generate the database layer as well as the application layer (web services) based on your model.

The modeling takes place in drawings. When you create a new model a drawing is automatically created for you. You can add any number of drawings to your model. New items are added to your model by simply dragging them from the toolbar on the left into a drawing.
Start off by adding entities to your model and attributes to your entities. Next add the relations between your entities. By using the supplied stereotypes in the left-hand toolbar you speed up the process of adding structure to your model. When your model is beginning to take form, add views and interfaces to your model. You can of course at any time add, remove or edit entities, attributes, relations, views etc.
Remember that RISE allows you to use multiple drawings in your models. In larger models we recommend you to implement different sub systems in different drawings. This will make your models much clearer and easier to follow. Every object can be displayed in multiple drawings. Select the object in one drawing, copy it and paste it into another drawing or drag and drop objects from your project tree view on the right-hand side of the RISE Editor into the desired drawings.
Entities
The Entity is the carrier of data and is likely to be the most important object type in your model. Entities can be directly mapped onto the relational database concept of tables and columns. It can also be seen as a subset of the object oriented concept of classes and members. You add entities to your model by dragging the entity symbol from the tool bar and dropping it into your drawing.

Attributes
You can add attributes to your entities by dragging the desired attribute symbol from the tool bar and dropping them onto the entities.
Relations
You relate your entities by dragging the desired relation symbol from the toolbar on the left and dropping it onto the source entity followed by clicking on the target entity. For more information, see below.
Stereotypes
The toolbar contains stereotypes for common information structures. You can of course create the structures your self using entities and relations. The stereotypes are there to simplify and speed up the process of adding structure to your model.
Tree
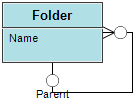
Suppose that you have created an entity called Folder in your model. What you really want is a folder structure (a tree structure) like the one in your file system. By dropping the Tree stereotype symbol onto the Folder entity RISE will add the relation needed to implement a tree structure.

List
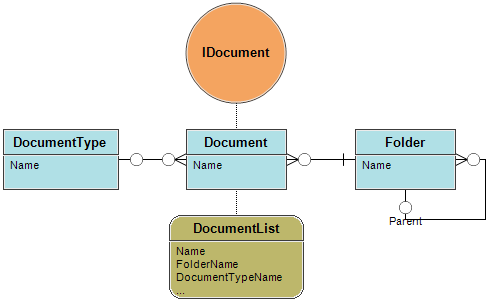
Let’s assume that you want your folder structure (created above) to be able to store documents. A folder can contain any number of documents and a document must be stored in a folder. By dropping the List stereotype symbol onto the Folder entity RISE will create a List entity for you and setup the relation between the Folder and List entities.

Classification
Maybe you decide that the documents should have a type and that the type should be selected from a list of predefined values. By dropping the Classification stereotype symbol onto your Document entity RISE will create the Classification entity and relate it to the Document entity.

Extension
Sometimes you need to extend an entity. Let’s assume that you have an entity called Vehicle and want to extend it with the entity Car. By dropping the Extension stereotype symbol onto the Vehicle entity RISE will create the Extension entity and relate it to the Vehicle entity.

Views
RISE supports creation of views. These views result, when generating relational database code, in SQL views. To add a view to your model, drag the view symbol from the left-hand tool bar and drop it onto the entity that you want to be the base entity of the view.

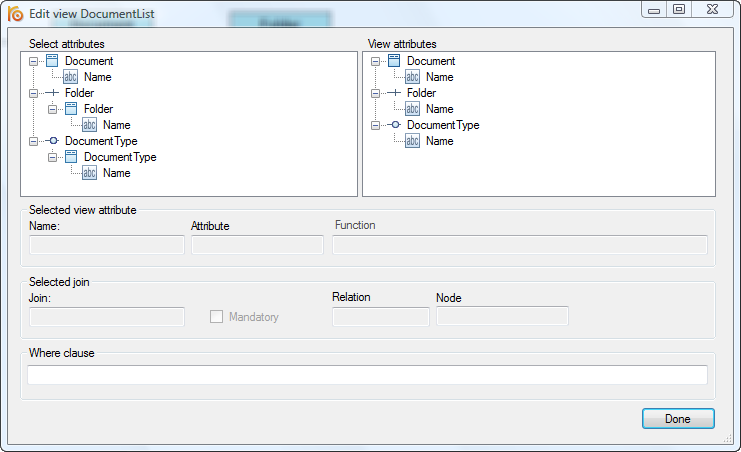
To edit the view, double click on it in your drawing or right-click on it and select Edit.

You compose the view by dragging the desired attributes from the left-hand tree view into the right-hand tree view.
The purposes of a RISE view are to:
- Combine an information structure into a single list of higher level objects, i.e. flattening out a structure.
- Apply a filtering condition to generate a subset of an entity or another view.
- Combinations of the above.
Read more
Interface
RISE supports adding programmable interfaces to an information model. This allows you to rapidly add and maintain a complete programming interface for any information model. The interfaces result, when generating code, into web services.

The easiest way to create an interface is to drag the interface symbol from the left-hand, tool box pane and drop it onto an existing object, i.e. an entity or a view. The interface will then automatically implement all methods needed to fully and efficiently work with the implemented object. To implement another object using the same interface right-click the interface and select "Implement..." from the popup menu and choose the object you want to implement. All methods needed for the new object will then be automatically added to the interface. Of course, you may add methods manually to an interface as well as modify or delete the generated methods. Read more
Methods
The easiest way to add methods to your existing interfaces is by dragging them from the left-hand toolbar and dropping them onto your interfaces.
Entity operation
Methods that operate directly on entities. The operation types are, New, Delete, Get, Set, List, Upload and Download. The New, Delete, Get, Set and List operations are always available for entity methods. If the entity contains Blob-fields, Upload and Download operations are also available.
View list
A view method implements a List operation on the selected view.
Composed
A composed method is a sequence of calls to other methods. You orchestrate this sequence using the method composer.
Custom
A custom method is a method neither implemented nor governed by RISE. When creating a custom method RISE generates a method stub with the specified arguments and return values. A programmer must of course provide the actual implementation of the method.
Relations (Common relations)
You relate your entities by dragging the desired relation symbol from the toolbar on the left and dropping it onto the source entity followed by clicking on the target entity. Read more
1 to 0..1 (One To Zero or One)
Typical use of this relation: The target entity extends the source entity.
1 to 0..n (One To Zero, One or Many)
Typical use of this relation: The source entity has a list of the target entity.
0..1 to 0..n (Zero or One To Zero, One or Many)
Typical use of this relation: The target entity has a reference to the source entity.
More relations (Less common relations)
These relations are not as common as the above relations and are therefore not described in this article. Click here to read more about these relations.
Text note
You can add text notes to your drawings to document your model. You can document individual objects by tying the text notes to the objects. To add a text note to your drawing, drag the text note symbol from the tool box and drop it into your drawing. If you want to tie the text note to an object, drop the text note symbol onto that object.
If you tie text notes to your objects and generate documentation for that object, or for the entire model, the text notes will be part of the documentation.
 |
|
|
|
|