CMS - A Comprehensive Example
This example CMS is a Visual Studio 2010 solution template with a set of projects providing a complete Content Management System with full source, management GUI's, an example site and a RISE system model for re-designing the system itself.
Download the CMS Visual Studio solution. The solution is a .VSIX file. Once it's downloaded you need to open/run the file to install it in Visual Studion 2010. You may also download and install the template directly inside Visual Studio using the
Extension Manager. To create a new project based on the template, simply select
New Project in the
File menu and then choose the
CMS template found under
Installed Templates for
Visual C#.
Use this solution as an introduction to the virtues of model-to-code, as an example of cutting edge RIA, as a starting point for building your CMS solution or, why not, as your ready-to-use CMS.
 |
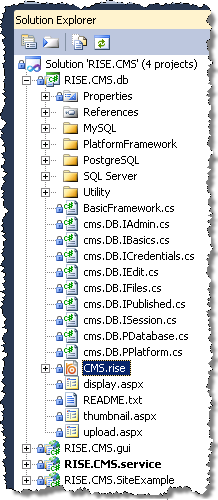
Solution content- Design model from which the server is generated.
- Auto-generated database scripts.
- Web services implementing the CMS backend.
- RIA user interfaces for
- content management incl. an online editor (Xinha) and
- system administration
- A simple site template.
PrerequisitesTo compile and deploy this solution you need Visual Studio 2010.
To run the overall system you need: - An IIS web server to host the applications.
- A database server (SQL Server, MySQL or PostgreSQL) to store your content.
To develop a site Visual Studio will do.
To develop (modify or extend) the CMS itself you may use the RISE suite: The RISE Editor and Code Generators are available in our Download Center. |
How to Deploy the CMS
To deploy this solution you need to setup the database and publish the web applications. Follow the steps below to deploy the entire system. Of course, the names and locations below are mere suggestions.
- Right-click the database script for the database of your choice and select "Update Database", then enter the connection string for your database and click the connect and update buttons. The script also sets up the default configuration of the CMS itself including some sample content and an administrators account.
- Create a folder "TestCMS" on your IIS. This is where to put the system.
- Create a sub-folder "service" in "TestCMS", publish CMS.service to that folder and, then, convert the folder to an IIS web application. To configure the web application:
- modify the appSettings cms-key to use your database.
- make sure the web application impersonates (runs as) a user with permission to read and write your SQL Server database. Or in case of MySQL or Postgres, use a data source, or connection string, that explicitly identifies the user.
- Create a sub-folder "gui" in "TestCMS" and publish CMS.gui to that folder. There's no ASPX in this project so there's no need to make this folder a web application. Note, the relative URLs in Javascript/CMSConfig.js must refer to the web service installed in step 3.
- Create a sub-folder "site" in "TestCMS" and publish CMS.SiteExample to that folder and convert the folder to a web application. You need to make sure the application settings URL, at the bottom of web.config, refers to the web service installed in step 3.
If everything is ok you'll now be able to access the following resources:
The sample site on http://localhost/testcms/site/default.aspx.
The CMS editor on http://localhost/testcms/gui/cmseditor.htm.
The admin utility on http://localhost/testcms/gui/cmsadmin.htm.
NOTE! default logon is admin admin
If it doesn't work the most probable cause is incorrect database credentials or a false URL. Verify that you may access the web services locally on http://localhost/testcms/service/cms.ws.isession.asmx. And, then, manually try to invoke the Start method.
Web Sites and Integration
You may build your site by modifying the example site or by including calls to the CMS web services from any other web application capable of calling them, for instance your current web site.
Look in the project CMS.SiteExample to see how to call the CMS web services from your web site app.
We've separated the actual database functionality and business logics from the web service and placed it in a reusable class library (CMS.db). This to allow you to integrate the server functionality directly in other applications that need to, entirely or partly, bypass the system logics. This could be the case, for instance, when importing data from a legacy system, when writing a custom power-client or to perform other
ETL-style tasks.
How to Extend the CMS
If you need to modify or extend the backend, open the model file CMS.rise in the RISE Editor and change the data model or business logics. Then simply right-click the file and choose "Generate code" to re-generate the code (c# source, web services, ajax proxies and database scripts).
If you need to modify or extend the frontend, it's plain Javascript programming using
YUI and some of our own classes that makes use of the auto-generated ajax/jQuery proxies.